Instructions on How to Replace Exterior Window Trim
By Mark J. Donovan
|
|
If your windows have wood exterior trim, chances are you will need to replace the window trim every 10 years or so. Inevitably weather, moisture, and insects take their toll on exterior window trim. The window trim becomes checked, split or punky due to moisture related issues.
When it comes time for replacing exterior wood trim, I highly suggest either going with solid plastic window trim or making sure you paint or seal all 6 sides of each piece of window trim prior to installing it around the window. |
Though more expensive than wood, solid plastic exterior window trim will virtually last forever and require less often repainting. Find a local window installation contractor here.
Installing Exterior Window Trim – Measure for Required Trim Material
Replacing exterior window trim begins by first measuring the length and width of the windows to determine the amount of linear feet of window trim required for the project. With your measurements in tote, visit your local home improvement store and purchase the required length of exterior window trim stock.
| Typically 1”x4” stock is ideal for most exterior window trim. Also make sure you pick up exterior nails for fastening the window trim. Make sure you select nails that will penetrate at least 1 inch into the framing.
In addition, make sure you buy some new window flashing. You may luck out and not need to replace the old window flashing, however I often find the old flashing corroded or in overall rough shape. Finally, make sure to buy some exterior caulk. |
 |
If you plan to use wood, make sure to prime, paint or seal the wood first on all sides. Also, keep your paint or sealer handy so that you can touch up trimmed edges.
Removing Old Exterior Window Trim
To actually remove the old exterior window trim, use a flat bar and a hammer to get underneath the nail heads and pry the nails from the window trim. After the nails are removed you should be able to easily remove the old exterior window trim from around the windows by simply pulling on the pieces.
| You may need to use your flat bar, however be careful not to damage the house siding when using it. Use a small block of wood to help protect the house siding when using the flat bar.
After removing the old exterior window trim, inspect the window area for any additional rot or damage to the window itself. Assuming there is none, you can continue on with replacing the exterior wood trim. |
 |
Installing Exterior Window Trim – Step by Step Instructions
Start by measuring and cutting a length of new window flashing. Slide the new window flashing up underneath the house siding that is above the window.
Next, measure and cut a length of window trim for above the window. If using wood, make sure you touch up the cut ends of the window trim with paint or a sealer.
Then install the top replacement exterior window trim piece, however just prior to installing it, apply caulk near the house siding edges and along the window edge.
| Once you have installed the top window trim fasten it with nails. I like to use two nails on each side edge, and two in the middle, with one nail about 2 inches above the other. If you are using solid plastic exterior window trim, then use a manufactured suggested adhesive and make sure you apply it to all joints and corners.
Next, install the side exterior window trim pieces by first measuring and cutting pieces to appropriate length. |
 |
Again, apply caulk to the house siding edges and the window edge prior to installing the replacement exterior window trim. Learn how to caulk a window here.
Depending upon the type of window, you may or may not need to install a bottom trim piece. In some cases the side trim pieces will rest on the window sill edge. In other cases the side trim bottom edge will butt up against either the house siding or the bottom trim piece. In either of these two latter cases apply flashing to the bottom edge of the side window trim pieces to prevent water from seeping behind the house siding
Once you have replaced the exterior wood trim, simply fill the nail holes if required, caulk around the window, and apply touch up paint.
If you need more help on choosing the right window replacement for your home, contact one of our pre-screened window installation contractors. They can help you select the replacement windows that are right for your home and budget, and perform the installation.
For more information on Installing Replacement Windows and Installing Interior Window Trim
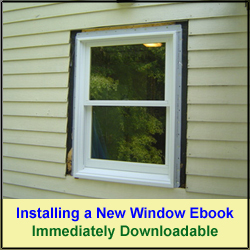
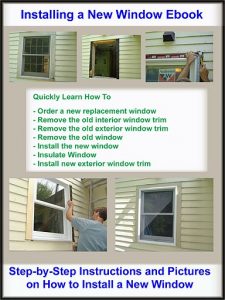
- See the Installing a New Window Ebook from HomeAdditionPlus.com. The Installing a New Window Ebook provides easy to understand, step-by-step instructions, on how to remove an old window and install a new one. Pictures are included for every key step in the process.
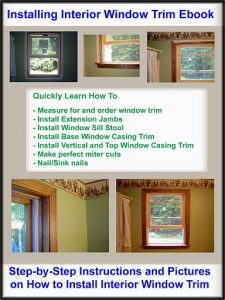
- See the Installing Interior Window Trim Ebook from HomeAdditionPlus.com. The Installing Interior Window Trim Ebook provides easy to understand, step-by-step instructions, on how to install interior window trim around a window. Pictures are included for every key step in the process.
Related Information
- How to Save Energy with Low-E Glass Windows
- How to Replace an Old Window
- A Guide to Buying Window Sash Replacement Kits
Additional Window Installation and Maintenance Resources from Amazon.com
 |
 |
Get Free Window Price Quotes, No Obligation!
Fill out our 3-5 minute quick and easy form, and receive a free price quote on windows from one of our prescreened and licensed window contractors. This process is free and there is no obligation to continue once you receive your window replacement price estimate.