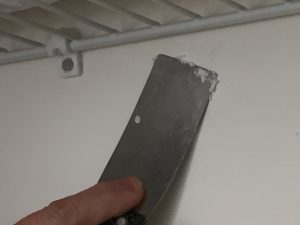
Instructions on How to Repair a Small Drywall Hole using Wall Spackle
By Mark J. Donovan
|
|
I’ve been doing a lot of painting in the interior of our new home recently and as part of the process I’ve needed to patch a lot of small drywall holes caused by nails and screws that were used for supporting wall hangings. Consequently I’ve done my fair share of spackling walls to cover the nail and screw holes, and I thought I might share a few tips with you on this subject.
Spackle Types You can purchase spackle in two forms, either in a lightweight pre-mixed compound form or in an all-purpose form. Both are elastic to help minimize shrinkage as they dry. |
I have exclusively used the lightweight pre-mixed spackle as it is perfect for filling small drywall holes caused by nails and screws. It contains a vinyl binding agent that is sufficient for patching small holes in areas where future damage is not expected, e.g. you’re not going to put another nail hole very near the same location. The all-purpose spackle type contains acrylic and is the perfect type for filling larger holes up to three quarters of an inch in diameter.
You can also purchase powdered spackling compound and mix it with the requisite amounts of water until it has the right paste-like consistency, but my view is why bother when you can buy it pre-mixed and it’s relatively cheap.
| Spackle Wall Surface
Use the tip or edge of a putty knife to scoop a small amount of spackle out of the container. Scoop a little more spackle onto the putty knife then you think you’ll need to fill the hole. Then press the spackle loaded putty knife edge into the small drywall hole to fill it. I prefer to fill the hole by placing the putty knife edge slightly above the hole and then swiping slowly down over the hole to fill it with the spackle. With the hole filed, use the putty knife to flair out and scrape away any excess spackle around the hole. You don’t need to fully clean the drywall surface. You just want to remove the significant excess material. |
 |
Later, after the spackle has had time to dry a little, use either a fine grit sandpaper or a slightly damp sponge to remove any residual spackle compound from the wall near the patched hole.
A couple hours later check to see if the spackle patch has remained flush with the wall surface. If it has recessed a little due to the spackle shrinking, repeat the process to eliminate the recessed dimple.
Once you’ve confirmed that the dry spackle is flush with the surrounding wall surface, lightly sand and dust off any final residual material with a rag. And with that completed, you’re now ready to prime and paint the wall.
See the Installing Interior Window Ebook from HomeAdditionPlus.com. The Installing Interior Window Trim Ebook provides easy to understand, step-by-step instructions, on how to install interior window trim around a window. Pictures are included for every key step in the process.
Related Information
- Painting New Drywall
- Touch-up Painting of Interior Wood Trim
- Insulating Paint Additives for Exterior House Paints
Additional House Painting and Staining Resources from Amazon.com
 |
 |
Painting and Staining Price Quotes For FREE, No Obligation!
Fill out our 3-5 minute quick and easy form, and receive a free price quote on painting & staining from one of our pre-screened and licensed painting & staining contractors. This process is free and there is no obligation to continue once you receive your painting price estimate.

