Pre-Finishing Wood Trim before Installing Saves Time and Mess and Ensures a Professional Finish
By Mark J. Donovan
|
|
Pre-finishing wood trim prior to installation is a great time saver. Whether you plan to install baseboard trim, door or window casing trim, crown molding, or chair rail, by pre-finishing the wood trim prior to installation you can save a lot of time and ensure a more professional job. In addition, you can pre-finish the wood trim in a ventilated area to reduce fumes. Moreover you can pre-finish the wood trim in an area more ideal for painting and staining, e.g. in a ventilated garage or basement area, thus preventing accidental spills and stains from occurring in finished living areas.
You can also pre-finish the wood trim at your leisure, over a number of days, since you won’t be interfering with the living area in any way. |
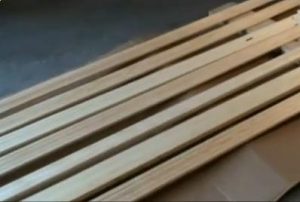
To pre-finish wood trim, start by purchasing quality wood trim lumber and the necessary stain, paint and priming products from your local home improvement center.
Next lay out newspaper onto a large work surface area such as a work bench. Then place short lengths of furring strips onto the covered work bench every couple of feet down the length of the work bench.
Now rest your wood trim pieces on the furring strips. The furring strips will ensure that the pre-finished trim will not stick to the newspaper as the primer, paint, stain or polyurethane dries.
Prior to actually pre-finishing the wood trim, lightly sand the trim pieces with fine grit sandpaper. This will help to ensure a more even finish. Sanding the wood trim cracks can take time and involves folding the sandpaper and working it into the cracks and sliding the paper along the length of the cracks. When finished sanding, use a tack cloth to wipe away any dust from the wood trim.
| Pre-Finishing Wood Trim with Stain
If staining, use a rag or sponge brush to apply the stain to the wood trim and apply it in long sweeping strokes. Prior to applying the stain, however, make sure to shake and/or stir the stain well. Immediately after applying the stain to a piece of wood trim, wipe it down with a clean rag to remove excess stain. Typically only one application of stain is required. Work gloves can be extremely helpful when applying the stain as stain can be difficult to wash off the hands. |
 |
After the stain has fully dried apply a polyurethane finish. You can choose either a satin or gloss finish. Again, make sure to wipe down the stained wood trim prior to applying the polyurethane. Depending upon the type of polyurethane you buy apply it with a clean cloth or a brush in long strokes that follow the grain of the wood. Normally 2 to 3 coats of polyurethane should be applied to the wood trim. Make sure to lightly sand the wood trim in between coats using either a very fine grain sandpaper or steel wool.
| Pre-finishing Wood Trim with Paint
If painting the wood trim, first prime it and allow it to dry before applying the paint. Apply the primer and paint in long sweeping motions with a brush, along the length of the trim pieces. After the first coat of paint has thoroughly dried apply a second coat. Pre-Finished Wood Trim Installation When installing pre-stained wood trim make sure to touch up cut edges with stain prior to attaching the pieces to the wall. Once the pre-stained wood trim has been installed use a wax stain pencil to plug the nail holes. |
 |
When installing pre-painted wood trim, fill the nail holes with wood filler or a paintable caulk. Then once the wood filler or caulk has dried, touch up paint the joints and nail holes.
See the Installing Interior Window Ebook from HomeAdditionPlus.com. The Installing Interior Window Trim Ebook provides easy to understand, step-by-step instructions, on how to install interior window trim around a window. Pictures are included for every key step in the process.
Related Information
Additional House Painting and Staining Resources from Amazon.com
 |
 |
Painting and Staining Price Quotes For FREE, No Obligation!
Fill out our 3-5 minute quick and easy form, and receive a free price quote on painting & staining from one of our pre-screened and licensed painting & staining contractors. This process is free and there is no obligation to continue once you receive your painting price estimate.