How to Attach Furring Shims to Concrete Basement Foundation Walls
By Mark J. Donovan
|
|
Are you thinking about finishing your basement? Many homeowners tackle their own finished basement projects. Finishing a basement is one of the least expensive ways to add finished living space to your home. One of the key components in remodeling a basement is finishing your basement foundation walls. When finishing your basement walls you have two choices; you can either frame 2×4 walls adjacent to the concrete foundations or you can attach furring strips to the concrete foundation walls. From there you can then insulate between the wall studs or furring strips and attach drywall to the wall studs or furring shims / furring strips.
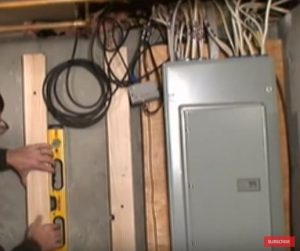
Attaching furring strips to concrete foundation walls is easier and cheaper than framing 2×4 walls adjacent to the basement foundation. I would however use 2x4s for the furring shims / strips rather than 1x3s. |
This way there is enough depth in between the furring strips to install rigid foam insulation. In addition, it allows low profile electrical outlets to be attached to the furring strips.
Note that the 2×4 should be attached to the wall on its flat side. Drill 3 to 4 pilot holes along the length of the furring strip.
| Next, apply a bead of construction adhesive to the back side of the furring shim and then reposition it into place on the wall. While holding the furring strip in place, hammer in a concrete nail into the top pilot hole in the furring strip. Note that it’s important that the pilot hole in the furring strip line up with the corresponding pilot hole in the foundation wall. Once the first nail is securely fastened, hammer in the remaining nails along the length of the furring strip. Repeat this process for attaching all of the furring strips to the wall.
Once the furring strips have been attached cut and install rigid foam insulation in-between the furring strip bays. If you’re installing wiring and electrical outlets, install them prior to installing the foam insulation.Next staple a sheet of polyethylene plastic over the furring strips and insulation to form a vapor barrier. |
 |
With the polyethylene plastic attached your ready for fastening drywall to your newly framed basement foundation walls.
For more help on Basement Additions, see HomeAdditionPlus.com’s Basement Remodeling Bid sheet. The Basement Remodeling Bid Sheet will help ensure that your hire the right contractor so that your basement remodeling project is done correctly and you get the project finished on time and budget.
Related Information
Get Free Basement Remodeling Price Quotes with No Obligation!
Fill out our 3-5 minute quick and easy form, and receive a free price quote on basement remodeling from one of our prescreened and licensed basement remodeling contractors. This process is free and there is no obligation to continue once you receive your basement remodeling price estimate.

