Step-By-Step Instructions on How to Replace a Bathroom Window
By Mark J. Donovan
|
|
The double hung wooden window in our bathroom was nearly 20 years old and looked every day of it. The spring mechanism for keeping the windows open had broken and the only way to keep them propped open was to use a board to hold them in position. The window panes themselves were hazy and the wood was water stained and unsightly. And that’s just on the inside of the window. The outside was even worse. The window sill was so severely checked and punky I could push my finger through it if I tried. Consequently it was more than time to replace my bathroom window.
To replace my bathroom window I first removed the interior window trim and took some measurements. I measured the height and width of the window frame and jotted the measurements down. |
I then went to my local home improvement center and found a replacement window that met the window frame rough opening measurements. I also chose to select a bathroom window replacement that was constructed out of wood but had vinyl sheathing over the exterior of it.
| Due to the fact that the window I selected was meant for brick molding and the type of exterior trim work around the existing window required a 3 inch molding, I also purchased some 1”x4” select grade pine trim. I also picked up 8d galvanized nails and 1-1/2 inch roofing nails.
The first step in actually replacing the bathroom window was to remove the old one. It was a fairly easy process. I removed the exterior side trim and then pried out the roofing nails that held the old window flange nailing tabs to the house exterior. I also used a hammer and nail punch to push through the finished nails that were holding the interior sides of the window frame to the window frame wall studs (jack studs). I was then able to remove the old window from the window frame. |
 |
To install the new bathroom window I first made sure the existing house wrap was stapled down to the interior of the rough window frame opening. I then placed the new bathroom window into the opening and used my measuring tape, level and a few wooden shims to make sure it was centered, plumb and level.
Once I had the new bathroom window where I wanted it I fastened it to the exterior house siding using a few 1-1/2 inch roofing nails. The roofing nails were applied at the plastic nail tabs on the exterior of the window. I then tested the window to make sure it opened and closed properly. Once I confirmed the new bathroom window was operating smoothly I installed additional roofing nails around the perimeter of the window. I installed nails every 6 inches or so along the window perimeter.
After replacing the bathroom window, I still had to install the exterior and interior window trim. I started with the exterior trim. First I primed and painted the 1”x4” select pine lumber and let it dry. Then I measured and cut the pieces to the proper length and widths and touched up painted the cut edges.
| I installed the exterior trim starting at the bottom and working my way upwards. In this particular window replacement project I only needed to install side rails and a top piece, so I installed the side rails first.
Before nailing the side rails into place I also installed two small pieces of Z-strip flashing on the house siding. I installed them just underneath where the side trim rails would go, so that any water that dripped down the exterior trim side rails would not wick underneath their bottom edges and behind the house siding. I then installed the top exterior window trim piece. With this piece of exterior trim piece I installed a length of Z-strip flashing over the top edge of the trim and underneath the house siding. I fastened the exterior trim pieces to the house sheathing using the 8d galvanized nails. I then caulked around all the seams. |
 |
For the interior window trim, I wound up returning to the home improvement center and buying window stool and 2-1/2 inch window casing molding. Again, I stained the pieces first and started from the bottom installing first the window stool, followed by the bottom apron. I then installed the interior window trim side rails followed by the top piece. Installing interior window trim takes a little more skill and a miter saw, and a coping saw. I used 6d and 8d finished nails to fasten the interior window trim to the wall. I also used a number of shims.
When installing the window trim it is best to initially tack the trim pieces into place with only a couple of nails and do not sink them. Once the entire interior trim has been tacked into place and looks good you can then go back and add more nails and sink them with a nail-punch and hammer.
If you need more help on choosing the right window replacement for your home, contact one of our pre-screened window installation contractors. They can help you select the replacement windows that are right for your home and budget, and perform the installation.
For more information on Installing Replacement Windows and Interior Window Trim
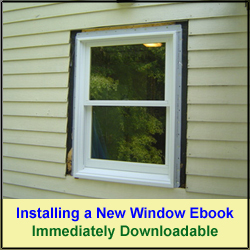
- See the Installing a New Window Ebook from HomeAdditionPlus.com. The Installing a New Window Ebook provides easy to understand, step-by-step instructions, on how to remove an old window and install a new one. Pictures are included for every key step in the process.
- See the Installing Interior Window Trim Ebook from HomeAdditionPlus.com. The Installing Interior Window Trim Ebook provides easy to understand, step-by-step instructions, on how to install interior window trim around a window. Pictures are included for every key step in the process.
Related Information
- How to Install Octagon Windows
- How to Install Replacement Windows
- A Guide to Buying Window Sash Replacement Kits
Additional Window Installation and Maintenance Resources from Amazon.com
 |
 |
Get Free Window Price Quotes, No Obligation!
Fill out our 3-5 minute quick and easy form, and receive a free price quote on windows from one of our prescreened and licensed window contractors. This process is free and there is no obligation to continue once you receive your window replacement price estimate.