Repairing a Mortar Shower Pan is Not an Easy Fix
By Mark J. Donovan
|
|
If you see a water stain on your lower level ceiling, or a wet spot on your basement floor, and you have a ceramic tile shower above either, then chances are you have a failed mortar shower pan.
If the mortar shower pan simply doesn’t seem to drain well, then it’s very likely that the mortar shower pan slope to the drain is inadequate or not uniform. Unfortunately, mortar shower pans often fail or don’t drain well because the installer took short cuts in the installation, or simply didn’t know what they were doing. |
I have installed a number of mortar shower pans over the years and have never had one fail. Watch my video on installing a mortar shower pan.
There is specific process that must be followed and a specific type and amount of materials that must be used to ensure a leak free mortar shower pan and one that drains properly.
Sadly, repairing a mortar shower pan is not a simple task. In most cases it means ripping out the failed mortar shower pan and starting from scratch. In some cases, you may be able to preserve the pre-slope mortar layer if it is determined to be installed properly.
| Disassembling a Poorly Draining or Failed Mortar Shower Pan
To disassemble a failed mortar shower pan start by removing all the shower floor tiles and about a foot of tiles up the shower walls. Use a cold chisel and a hammer to remove the tiles. Make sure to wear eye protection and leather gloves when doing this as ceramic tile pieces fly everywhere. Next, if the shower pan simply doesn’t drain well simply sand out the high spots with a brick on the mortar surface to create a more consistent slope from the shower walls to the drain. Make sure to periodically check the slope with a spirit level as you sand the mortar shower pan surface. |

Learn how to install a mortar shower pan correctly with this eBook. |
In some cases you may need to add more mortar to create a consistent and even slope. If you do need to add more mortar make some reference line marks along the shower walls to mark the finished height of where the mortar should come up to. You want to have a finished mortar pan slope of about 3/16 to ¼ inch drop per 12 inches of run from the shower walls to the drain.
As a result, you will have to decrease the depth of the mortar as you approach the drain.
| If you have a failed shower pan that is leaking, then you’ll need to continue on with the disassembly of it after removing the tiles. Use your hammer and chisel to break up and remove the base layer of mortar.
After removing the base layer pull out the old shower pan membrane liner and inspect the pre-slope mortar layer. If it has an inadequate slope to it, then continue on and hammer and chisel it out of the shower floor base. |
 |
Installing a New Mortar Shower Pan
After removing all of the failed mortar shower pan you can begin the process of installing a new one. First, make sure that the wood subfloor is at least 1-1/4 inch thick. See this mortar shower pan stack-up video.
If not, add another layer of plywood over the existing subfloor and screw it down well to the floor joists.
Next, install the pre-slope mortar layer. Note that it is important that the pre-slope mortar layer provide the necessary pitch from the shower walls to the drain. Again, the slope should be about 3/16 to ¼ inch per foot.
You’ll then need to install a new shower pan membrane liner followed by another final base layer of mortar. The second layer of mortar must maintain the same pitch as the pre-slope layer.
If you want detailed instructions on installing a mortar shower pan, then check out my Shower Pan Membrane Liner Installation Ebook. It provides detailed instructions for every step in the process and is loaded with instructional pictures. I’ve used the same process in my ebook for installing my mortar shower pans, and again, after 14 years of use I have never had any fail.
Once you’ve completed the installation of the new mortar shower pan, or made the necessary repairs to the old one, re-tile the shower walls and floor to complete the project.
For information on installing a shower pan membrane liner for a ceramic tile shower, see the Shower Pan Membrane Liner Installation Ebook from HomeAdditionPlus.com. The Shower Pan Membrane Liner EBook will quickly teach you the step-by-step process for installing the shower pan membrane liner correctly. It includes instructions on framing the shower stall, pouring the pre-slope and shower base mortar, and installing the shower pan membrane liner.

See HomeAdditionPlus.com’s Ceramic Tile Calculator
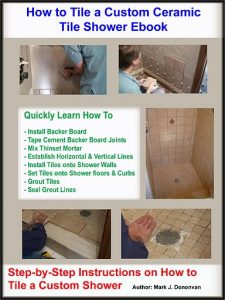
See my “How to Tile a Custom Ceramic Tile Shower” Ebook to learn how to tile your own shower: For a detailed set of instructions on tiling a shower floor and walls, including pictures for every step in the process, see my “How to Tile Custom Ceramic Tile Shower Ebook”.
Related Information on Tiling Showers
- How to Tile a Shower Curb
- How to Install a Mortar Shower Base
- Shower Mortar Pan Stackup Video
- How to Tile a Shower Floor and Curb Video
Additional Ceramic Tile Resources from Amazon.com
 |
 |
 |
Get Free Bathroom Remodeling Price Quotes with No Obligation!
Fill out our 3-5 minute quick and easy form, and receive a free price quote on a bathroom remodeling project from one of our pre-screened and licensed bathroom remodeling contractors. This process is free and there is no obligation to continue once you receive your bathroom addition price estimate.