A Custom Tiled Shower Requires Building a Shower Base
By Mark J. Donovan
|
|
A custom ceramic tiled shower will add charm and beauty to your bathroom, not to mention increase the value of your home. However, before embarking on the installation of a custom tiled shower you first need to build a shower base. Building a shower base involves sandwiching a flexible shower membrane liner in between two layers of mortar.
It is critical to build a shower base properly to ensure a leak free shower. If done improperly water will slowly work its way through the shower floor onto lower level ceilings. |
In addition, a leaky shower base will lead to mold and mildew growth, and rot surrounding framing lumber.
Far too often I hear of stories where remodeling contractors build a shower base by simply pouring one layer of mortar in the base of a shower stall. This is a recipe for disaster.
Also, a sheet of felt paper and metal lath need to be installed into the base of the shower floor prior to pouring the mortar.
After pouring a pre-sloped mortar bed, and allowing time for it to cure, the next stage in building a shower base is to install the flexible shower membrane liner. It needs to be folded and nailed or stapled onto the shower stud walls and over the shower curb. In addition, an opening over the shower drain needs to be cut out for water to drain from the shower base.
| When nailing the membrane liner to the wall studs it is important to nail it up near the top edges of the liner.The next step in building a shower base is to install the cement backer board along the shower walls. Lay some cardboard over the shower liner to prevent damaging it when installing the cement backer board.
Next, hand shape some metal lath and install it over the shower curb area. Nail to the outside edge of the shower stall. |
Once the backer board and curb metal lath have been installed, the final layer of mortar can then be poured into the shower base. It is important to make sure that the shower base slope is maintained towards the drain when troweling in the final layer of mortar.
Finally, trowel mortar over the curb and shape it into a rectangular shape.
Once the mortar has set up, you can then begin the process of tiling your custom ceramic tiled shower.
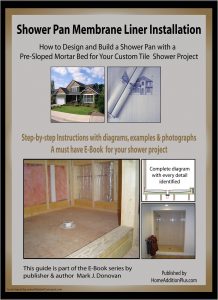
For information on installing a shower pan membrane liner for a ceramic tile shower, see the Shower Pan Membrane Liner Installation Ebook from HomeAdditionPlus.com. The Shower Pan Membrane Liner EBook will quickly teach you the step-by-step process for installing the shower pan membrane liner correctly. It includes instructions on framing the shower stall, pouring the pre-slope and shower base mortar, and installing the shower pan membrane liner.
See HomeAdditionPlus.com’s Ceramic Tile Calculator
See my “How to Tile a Custom Ceramic Tile Shower” Ebook to learn how to tile your own shower: For a detailed set of instructions on tiling a shower floor and walls, including pictures for every step in the process, see my “How to Tile Custom Ceramic Tile Shower Ebook”.
Related Information
Additional Ceramic Tile Resources from Amazon.com
 |
 |
 |
Get Free Bathroom Remodeling Price Quotes with No Obligation!
Fill out our 3-5 minute quick and easy form, and receive a free price quote on a bathroom remodeling project from one of our pre-screened and licensed bathroom remodeling contractors. This process is free and there is no obligation to continue once you receive your bathroom addition price estimate.

