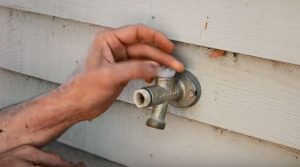
Simple Instructions for fixing a leaky Silcock / Outdoor Spigot
By Mark J. Donovan
|
|
Every spring it seems to happen. Maybe its because I live in the great white north of central New Hampshire, or maybe it’s due to the low quality outdoor faucets that were installed in my homes.
The bottom line, just about every spring I hook up the hose to my outdoor faucets, turn the faucet handle on, and quickly discover I have a leaky anti-siphon valve. You know, that plastic cap thing that sits behind the faucet handle on the top side of the outdoor spigot. |
The anti-siphon valve it designed to prevent water from back-flowing into the water supply line and into the home’s potable water supply, and potentially contaminating it. So, it has a valuable purpose. It’s just that so often the anti-siphon valve ends up being the source of a leaky outdoor spigot, a.k.a. hose bibb.
The good news is its easy to replace a leaky anti-siphon valve on an outdoor faucet. There’s no need to call a plumber and spend a couple of hundred dollars to have him/her fix it. With about five minutes of effort, and for less than ten dollars, you yourself can replace an anti-siphon valve on an outdoor faucet.
|
Steps for Replacing the Anti-Siphon Valve on an Outdoor Faucet The first step in replacing an anti-siphon valve is to turn water off to the outdoor faucet. Typically, you will find a valve inside the home, such as in the basement, that is associated with the outdoor spigot. Turn this valve off and then go out and turn the handle wide open on the outdoor spigot to confirm the water is no longer flowing out of it. |
 |
Next, using a common screwdriver or a nut and ratchet set remove the screw that holds the outdoor faucet handle onto the faucet. This will allow you to have easier access to the anti-siphon valve.
Next, using your screwdriver remove the small screw that holds the spigot handle to the faucet assembly.
Now remove the handle from the faucet.
|
Once you’ve unscrewed the old anti-siphon valve body from the outdoor faucet, screw in the replacement anti-siphon valve body using your fingers. Make sure first, however, to insert the little piston that comes in the anti-siphon replacement kit into the valve body. After finger tightening the new anti-siphon valve body carefully use the adjustable pliers to turn it another quarter of a turn or so. |
|
Next, snap on either the old or new anti-siphon valve cap. If the anti-siphon valve replacement kit includes a new valve cap, use it in lieu of the old cap.
Finally reattach the faucet handle onto the end of the outdoor faucet, making sure the associated screw is snugged down firmly using either your screwdriver or nut and ratchet set.
Lastly, go into the house and turn the valve on to the outdoor spigot, and then go back outside and turn the outdoor faucet handle to the full open position. With any luck your leaky outdoor faucet’s anti-siphon valve is no longer leaking and your work is done.
For information on installing a shower pan membrane liner for a ceramic tile shower, see the Shower Pan Membrane Liner Installation eBook from HomeAdditionPlus.com. The Shower Pan Membrane Liner EBook will quickly teach you the step-by-step process for installing the shower pan membrane liner correctly. It includes instructions on framing the shower stall, pouring the pre-slope and shower base mortar, and installing the shower pan membrane liner.
For information on how to tile a custom ceramic tile shower, see the “How to Tile a Custom Ceramic Tile Shower eBook” from HomeAdditionPlus.com. This eBook will quickly provide you with step-by-step instructions on how to measure and install ceramic tile in a shower, including the installation of tile on shower walls, floors and curbs. It provides detailed instructions for every step in the process of tiling a custom ceramic tile shower and is loaded with instructional pictures!
Related Information
- How to Fix a Slow Bathtub Drain
- How to Clear a Clogged Sink Drain
- How to Repair Silcock when Leaks from Cap on Top
- How to Fix a Leaky Hose Bib
Additional Plumbing Resources from Amazon.com
 |
 |
Get Free Bathroom Remodeling Price Quotes with No Obligation!
Fill out our 3-5 minute quick and easy form, and receive a free price quote on a bathroom remodeling project from one of our pre-screened and licensed bathroom remodeling contractors. This process is free and there is no obligation to continue once you receive your bathroom addition price estimate.

