Simple Instructions for fixing a leaky Silcock / Outdoor Spigot
By Mark J. Donovan
|
|
Do you have a leaky outdoor faucet? If so you should resolve the problem quickly before it causes potential water damage to your home and yard. A constantly dripping outdoor faucet can also add up in expenses if you are on a metered water supply.
A DIY homeowner can often fix a leaky outdoor faucet on their own, thus preventing the need for having to call in an expensive plumber. All you need is a crescent wrench, a screwdriver, and about a half hour of your time. |
Determine the Source of the Leak
To fix a leaky outdoor faucet first find the source of the leak by examining the spigot carefully. Check the vacuum cap that sits on top of the frost-free spigot to see if it is the source of the leak.
If it is, try tightening it with your hand. Often this cap can become loose over time due to the constant expansion and contraction that occur with changing outdoor ambient temperatures.
If there is no leak around the vacuum cap, then check the faucet spout. If you see water dripping out of it, then most likely there is a failed washer inside the faucet handle and you will need to replace it.
| Getting Access to Faucet Washer
To get access to the washer first turn the water supply off to the outdoor faucet. Typically there is a shutoff valve to it inside the house or basement, and it is normally located near where the outdoor faucet exits the house. The shut-off valve could also be located in a utility room. With the water turned off to the outdoor spigot, open the valve to the full on position to drain any residual water from the spigot. |
 |
Next, using your screwdriver remove the small screw that holds the spigot handle to the faucet assembly.
Now remove the handle from the faucet.
| Then, use a crescent wrench to loosen and remove the faucet nut that sits behind the handle location. As you remove the faucet nut, you should see a washer just behind it. Often it is this washer that is the culprit in causing the leaky outdoor faucet. You may have to use your screwdriver to remove the washer from the faucet assembly.
Carefully inspect the washer and if it looks damaged, distorted, or severely compressed replace it with a new one. You should be able to find a replacement washer at any hardware store. If the faucet nut is simply coated in grime then rinse it off with water and re-install it. |
 |
Re-Assembling Outdoor Faucet
After you’ve found a replacement washer, insert it into the outdoor faucet assembly and re-attach the faucet nut. Hand-tighten the nut at first to make sure you don’t cross-thread it, and then use your crescent wrench to tighten it up.
Next, re-attach the handle to the outdoor faucet with your screwdriver.
Finally, turn the water supply back on and confirm that water runs freely out of the frost-free spigot. Assuming it does, turn the outdoor spigot handle to stop the flow of water from the spout. With any luck the leaky outdoor faucet is a thing of the past.
| It is important to understand that if it is a frost-free spigot it may take a minute or two after shutting off the spigot for water to stop dripping from the spout. The reason for this is that the valve associated with a frost-free outdoor faucet sits approximately 6 to 8 inches back inside the spigot assembly.
Thus, the actual valve is located inside the home or basement where freezing is not a concern. |
|
As a result of the valve being located 6 to 8 inches back inside the spigot assembly, it can take a little time for the residual water inside the pipe and spout to drain out.
For information on installing a shower pan membrane liner for a ceramic tile shower, see the Shower Pan Membrane Liner Installation eBook from HomeAdditionPlus.com. The Shower Pan Membrane Liner EBook will quickly teach you the step-by-step process for installing the shower pan membrane liner correctly. It includes instructions on framing the shower stall, pouring the pre-slope and shower base mortar, and installing the shower pan membrane liner.

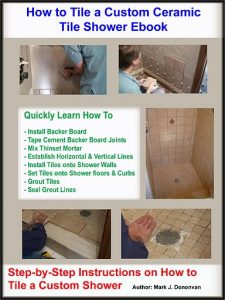
For information on how to tile a custom ceramic tile shower, see the “How to Tile a Custom Ceramic Tile Shower eBook” from HomeAdditionPlus.com. This eBook will quickly provide you with step-by-step instructions on how to measure and install ceramic tile in a shower, including the installation of tile on shower walls, floors and curbs. It provides detailed instructions for every step in the process of tiling a custom ceramic tile shower and is loaded with instructional pictures!
Related Information
- How to Fix a Slow Bathtub Drain
- How to Clear a Clogged Sink Drain
- How to Repair Silcock when Leaks from Cap on Top
- How to Fix a Leaky Hose Bib
Additional Plumbing Resources from Amazon.com
 |
 |
Get Free Bathroom Remodeling Price Quotes with No Obligation!
Fill out our 3-5 minute quick and easy form, and receive a free price quote on a bathroom remodeling project from one of our pre-screened and licensed bathroom remodeling contractors. This process is free and there is no obligation to continue once you receive your bathroom addition price estimate.