House Painting Tips that will Save you Time, Money and Frustration
By Mark J. Donovan
|
|
Painting is one of those home maintenance projects that few of us enjoy but frequently have no choice but to do. If your home has exterior wood siding, mother-nature pretty much dictates painting the exterior of the home every 5-7 years. Between sun, moisture and dramatic temperature changes, exterior house paint begins to fade, crack and peel after just a few years. The interior walls of the home can take a similar beating, however instead of mother-nature inflicting its wrath, it is from our own human afflictions, particularly if children are living in the home.
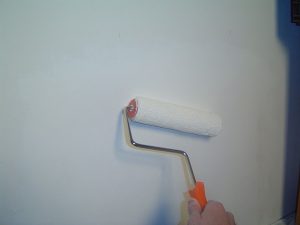
When tackling a home painting project there are a number of house painting tips that can make your painting project go more smoothly and give you a more professional finish. |
Listed below are my top 10 house painting tips for making your home painting project go a little smoother.
1) Prepare the painting area appropriately. This includes removing items and obstructions from the room or work area, such as curtains, furniture, and mechanical hardware wherever possible. Also make sure the room is well ventilated if you are working on an interior home painting project. In addition, fill all holes or cracks with spackling and tape all items that you do not want to paint and cannot remove from the walls. Also, it is advisable to wipe down wall surface areas with a damp cloth prior to applying paint. You would be surprised how much dust clings to wall surfaces.
Finally, if you are tackling an interior paint project remove all outlet and switch face plate covers prior to painting. You will waste more time cutting around them and inevitably leave paint marks on some of them.
Make no mistake, no time is more wasted in a house painting project than shuffling articles around the room, removing outlet covers at the last minute, and cycling between taping and painting. When the preparation work is all complete, then pull out the paint brush and rollers.
3) In the event you are using a paint sprayer, e.g. for painting the exterior of your home, use newspaper and masking tape to cover windows and other large non-desired painting surfaces.
4) Use plenty of drop cloths and have a damp rag in your pocket at all times when painting. Attempting to not drip is a time consuming chore in itself. Unless you want to have a contest while painting to see who drips the least paint, use copious amounts of drop cloths. Having the damp rag in your pocket will save time when you make that minor mistake with the cutting brush.
| 5) Have a sufficient number of ladders with the appropriate height requirements. Running up and down ladders and constantly readjusting them is time consuming and tiring. Using the wrong ladder can also be dangerous to your personal well being.
6) If the walls have never seen paint, e.g. bare sheetrock, prime them first. You will save money on high priced paint absorption and you will get a much better finish. 7) Cut first with a small angled paint brush and then pull out your paint rollers. By rolling paint after you cut the corners and wall/ceiling transitions, you can hide the brush marks and achieve a nicer finish. |
 |
8) Make sure weather conditions are right for painting. Hold off painting the exterior of a home until you are sure the siding is completely dry and free of moisture. Also make sure the weather forecast is free of rain and fog, and the temperature is above 50o Fahrenheit. Even if you are tackling an interior home painting project, it is best to paint on a dry and low humidity day. Dry, humid free days will allow for quick drying times.
9) If you are using latex paint make sure to clean your brushes thoroughly after use. If you are using an oil based paint use mineral spirits to clean your brushes. Nothing can be more frustrating to go out the second day on your paint project and find your brushes hard and unusable.
10) Finally, have a radio or Ipod player nearby. Nothing helps to soothe the soul more, when undertaking a mundane home painting project, than listening to your favorite music while you paint.
Happy House Painting!!
See the Installing Interior Window Ebook from HomeAdditionPlus.com. The Installing Interior Window Trim Ebook provides easy to understand, step-by-step instructions, on how to install interior window trim around a window. Pictures are included for every key step in the process.
Related Information
Additional House Painting and Staining Resources from Amazon.com
 |
 |
Painting and Staining Price Quotes For FREE, No Obligation!
Fill out our 3-5 minute quick and easy form, and receive a free price quote on painting & staining from one of our pre-screened and licensed painting & staining contractors. This process is free and there is no obligation to continue once you receive your painting price estimate.

