How to Paint a Home Like the Pros
By Mark J. Donovan
|
|
Painting a home is a big project however it’s not that complicated to do. If you follow the home painting tips described below you can achieve a professionally painted house or home finish and save yourself a boatload of money in the process.
Exterior Home Painting The first step in any exterior home painting project is to repair any damage to the house siding and trim work. If clapboards are damaged its best just to simply replace them. If there are only minor dings to the house siding clapboards then you can get away using just a wood filler or epoxy to fill the dings. |
Also, if the house trim is damaged in anyway either through insect or water damage, replace it altogether. There is no point in painting over insect eaten or punky wood trim.
Another key home painting tip is to remove all shutters from the home, if any, and paint them on the ground or in a garage. You’ll save yourself a ton of time doing so, achieve a better paint job, and reduce your risk of falling off a ladder.
Once the repairs have been made to the house siding and trim, the next step in the home painting process is to thoroughly clean the house siding and trim. It is best to use a pressure washer for this task. When using a pressure washer make sure to use it at its lowest pressure setting so that you do not damage the siding. Also, start from the bottom of the house and work your way upwards. In addition, make sure to use a commercially available house siding product with the pressure washer. This will help to remove mold and mildew on the siding.
| After washing the house siding and allowing a day or two for it to fully dry out, you’re nearly ready to start the exterior home painting. However, first you need to prepare the home’s surrounding area for painting. Cover all plants and shrubs next to the house with drop cloths. In addition, cover patios, walkways and driveways with drop cloths. Also remove any garden hoses and other obstacles that you could trip over.
With your house and surrounding area prepared for painting, you can now actually begin the task. Make sure, however, to check the weather forecast to ensure you have a few day window of dry weather to paint. The last thing you want to do is starting painting your home and have it rain while the paint is still curing. |
 |
Whether you are painting wood, aluminum or vinyl house siding you should first apply a primer to the house siding. The primer will ensure a solid paint bond to the house siding.
When exterior home painting, you’ll most likely use several gallons of paint. Even though you bought the same brand and color of paint one wise home painting tip is to mix 2 or 3 gallons of paint in a 5 gallon bucket to ensure a common color/tint. Also don’t paint out of paint cans. Use specially designed painting buckets to hold the paint that you’re applying to the house.
Whether you’re painting wood, aluminum or vinyl house siding, a spray gun helps speed up the home painting process and achieve better results. You can rent paint sprayers at most home improvement centers. Paint brushes on wood clapboards also work fine, however it will go slower and you’ll certainly end up with a sore wrist.
Another key home painting tip is to start at the top of the house and work your way down. By doing so you can prevent inadvertently dripping paint on previously painted clapboards.
After painting the house siding, go back and paint the trim work to complete the project.
| Interior Home Painting
Many of the same exterior home painting tips already mentioned above are germane for interior home painting. Remove all wall hangings and items from the room and patch the walls using spackle. Lightly sand the spackled areas after the spackle has dried. Next, apply masking tape around door and window trim edges and any other surfaces you don’t want painted. If the walls have never been painted, or you’re planning to cover over dark wall paint with a lighter paint, prime the walls first. |
 |
Then use a 2 inch tapered paint brush to cut along the wall edges, at first near the top of the ceiling, and then in the corners and around the doors and windows.
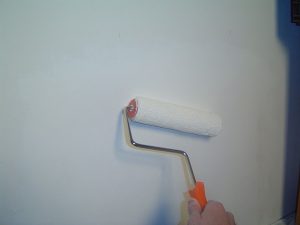
Use a roller to paint the main wall surfaces. Make sure to use the right thickness nap for the roller itself. Usually the paint container will include instructions on what nap thickness to use. If not, ask the clerk at the paint store. When applying the paint with a roller, make large W and M type motions, making sure not to stop in the middle of the wall.
After the first coat of paint has dried, apply a second coat to achieve a professional home painting finish.
See the Installing Interior Window Ebook from HomeAdditionPlus.com. The Installing Interior Window Trim Ebook provides easy to understand, step-by-step instructions, on how to install interior window trim around a window. Pictures are included for every key step in the process.
Related Information
Additional House Painting and Staining Resources from Amazon.com
 |
 |
Painting and Staining Price Quotes For FREE, No Obligation!
Fill out our 3-5 minute quick and easy form, and receive a free price quote on painting & staining from one of our pre-screened and licensed painting & staining contractors. This process is free and there is no obligation to continue once you receive your painting price estimate.