Two Methods for How to Calculate Even Spacing Between Balusters
By Mark J. Donovan
|
|
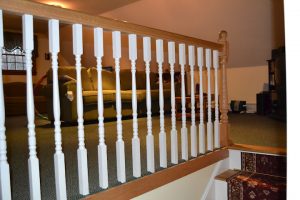
There are two methods that I have used for calculating how to evenly space out balusters along a railing. I summarize them below.
Method One for Calculating Even Baluster Spacing The first step in proper baluster spacing is determining the on-center spacing for your balusters. Many local building codes require a maximum on-center baluster spacing of 4 inches. You may want to familiarize yourself with various other residential building codes here. |
Next, find the center point on the railing and make a pencil mark.
This will be the location of your center baluster. The baluster should be installed so that it is centered directly under this pencil mark.
| Now, continue to make pencil marks on either side of the railing center point mark, at on-center spacings of 4 inches (assuming you want an on-center baluster spacing of 4 inches). This will be your baluster spacing.
At each mark install a baluster such that it is centered directly under the mark. This approach will provide even spacing of the balusters along the length of the railing. |
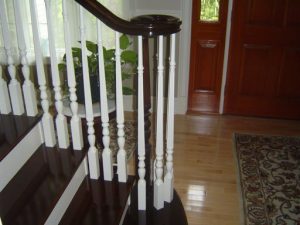 |
The only limitation with this deck baluster spacing calculator approach is that at the far ends of the railing the final baluster spacing between the newel post and wall will most likely be less than 4 inches. This approach meets code, but might be aesthetically unappealing to some.
Next measure the length of the railing and add the width of one baluster to it. Make a note of this measurement + baluster width. I will call it (RL).
Now add the on-center spacing requirement and the width of one baluster and make a note of this calculation. I will call it (BW).
Next multiply the number of balusters required (RB) by the baluster width, and then subtract this value from the railing length, plus one baluster width. So for example, 103 – (17×2) = 69.
Now divide this result by BR+1, e.g. 69 / (17+1) = 3.83 inches. This value (Baluster spacing = BS) represents the required even, on-center, baluster spacing.
For an odd number of balusters locate the first one at the center of the railing. The baluster should be centered directly underneath the center of the railing. For an even number of required balusters, you will need to locate the first two balusters from the center railing point half the baluster spacing (BS) amount. After the first balusters have been installed you can continue to space them out from each other by the BS calculation (in this example 3.83 inches).
Watch my video on how to install a composite deck railing system which shows how to install balusters evenly between rail posts.
Dress Up Your Home with Crown Molding – For specific instructions on installing crown molding see the “Installing Crown Molding Ebook“. The “Installing Crown Molding Ebook” will show you how to properly measure, select, cut and install crown molding like a professional carpenter. It provides detailed instructions on every step in the process of installing crown molding and includes 28 instructional pictures! Order and Immediately Download today!. 100% Money-Back Guarantee if you are not satisfied.
For information on installing Window and Door trim see HomeAdditionPlus.com’s Installing Interior Window Trim Ebook and Installing Interior Door Trim Ebook. These Ebooks are loaded with pictures and provide easy to understand, step-by-step instructions, on how to install interior window and door trim.
 |
 |
Related Information
Additional Finish Carpentry Resources from Amazon.com
 |
 |
Free Home Addition Price Quotes with No Obligation!
Fill out our 3-5 minute quick and easy form, and receive a free price quote on a house addition from one of our prescreened and licensed home addition contractors. This process is free and there is no obligation to continue once you receive your house addition price estimate.

