How to Repair Drywall after Minor Water Damage Caused by Ice Dams
By Mark J. Donovan
|
|
In this video Mark Donovan of HomeAdditionPlus.com shows how to make a simple drywall repair.
This past winter was brutal in New Hampshire. We had over nine feet of snow and incredibly cold weather. To combat the risk of large ice dams forming on my home’s main roof I installed deicing heat cables a couple of winters ago on it, which I must say, work extremely well. However, the roof over my garage addition, and that abuts up against the side wall of my house, does not have deicing heat cables on it. As a result, snow built up quite heavily in the area between the house siding and the garage roof edge. Ice dams also formed near the garage roof eaves.
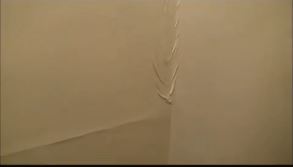
| Due to the buildup of snow and ice dams, I wound up having a minor water leak into the house. Water ran down the interior wall between the main house and garage addition, and underneath the layer of paint on the drywall.
This caused the paint to at first bubble. Eventually it dried out, but left a wrinkled mess. The water also ran along a horizontal drywall tape seam, eventually leaving an ugly, bulgy tape seam. |
 |
So with all this said, I ended up with a simple drywall repair project to fix the water damage to the drywall. I captured my drywall repair work in a short video that can be seen on this webpage. Also, I summarize below all the steps I took to repair the drywall.
Step1: Use a six inch taping knife to remove all of the wrinkled old paint along the wall seam and corner. Also remove the old drywall tape.
Step2: After removing the loose paint, sand down the paint edges around the affected wall seam and corner.
Step 3: Apply a layer of joint compound over the seam with the six inch taping knife, where the old drywall tape was.
| Step 4: Apply a section of drywall mesh tape into the seam and skim coat over it and the surrounding area with joint compound. Also apply joint compound to the affected corner. Then let the joint compound fully dry.
Step 5: Apply a second of joint compound over the seam using a twelve inch drywall blade. The larger blade is used to flare out the seam. Use the six inch taping knife to also apply a second coat of joint compound to the corner. Then again, let the joint compound fully dry. Step 6: Repeat step 5 one more time for the third and final coat. However, make sure to use a very thin layer of joint compound with this coat. Then again, let the joint compound fully dry. |
 |
Step 7: Use a drywall mesh sanding screen to sand around the edges of the mudded area, focusing more on the peripheral edges and less directly over the seam. Also make sure to lightly sand the corner.
Step 8: Wipe down the sanded surfaces with a slightly damp cloth.
Step 9: Apply a layer of primer over the mudded areas.
Step 10: Apply two layers of paint over the drywall repaired surfaces to complete the project.
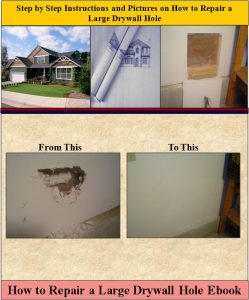
For information on repairing a large drywall hole, see the “How to Repair a Large Drywall Hole” Ebook from HomeAdditionPlus.com. The “How to Repair a Large Drywall Hole” Ebook provides step-by-step instructions on how to repair your damaged wall so that it looks as good as new.
See HomeAdditionPlus.com’s Drywall Calculator
Related Information
Additional Drywall Installation Resources from Amazon.com
 |
 |
Free Home Addition Price Quotes with No Obligation!
Fill out our 3-5 minute quick and easy form, and receive a free price quote on a house addition from one of our prescreened and licensed home addition contractors. This process is free and there is no obligation to continue once you receive your house addition price estimate.