How to Repaint a Popcorn Ceiling
By Mark J. Donovan
|
|
Is your popcorn ceiling looking a little dingy? Is there the occasional spaghetti sauce stain decorating your popcorn ceiling? If so you may want to consider repainting your popcorn ceiling.
Repainting a popcorn ceiling is an easy project for most do-it-yourself homeowners. To repaint a popcorn ceiling you will need a paint roller with an extension, a heavy nap paint roll, a paint tray, a 2.5” paint brush, ceiling paint, masking tape, screwdriver, large drop clothes, and some muscle. Holding your hands over your head for a few hours can get a little tiring on the arms, shoulder and neck muscles. |
The first step in repainting a popcorn ceiling involves removing all furniture and items from the room, and removing any cobwebs and dust from the ceiling using a duster and or vacuum cleaner.
| The next step in repainting a popcorn ceiling is to tape off around light fixtures, vents and any other electrical fixture covers using masking tape. If you can remove the light fixtures, vents and fixture covers even better.
Next tape around the wall edges next to the ceiling so that you can prevent from painting the walls with the ceiling paint. With the ceiling prepared for paint, lay drop clothes on the floor to protect it from paint drippings. Finally, open windows to allow sufficient ventilation while painting. |
 |
Repainting the Popcorn Ceiling
Once the room and ceiling have been prepared for paint, prepare your paint roller and pour some of the ceiling paint into the paint tray.
First start out by using your paint brush and cutting the edges of the ceiling. You will want to cover the first 2 to 3 inches of the ceiling, near the walls, before moving on with the paint roller.
Once the cutting has been completed you can then move on to the paint roller.
| Roll the paint roll thoroughly into the paint tray so that it is fully coated, however don’t put so much on that it drips.
Now begin repainting the popcorn ceiling by starting in one corner of the room and working your way across the room in large 3-4 foot wide swaths. Make sure when rolling the paint you move the paint roller forwards and backwards and then in a V pattern to ensure an even distribution of the ceiling paint. It is important to keep moving when painting the popcorn ceiling and not work the paint roller too hard into the ceiling. It is also important to not go over the same area too much as you could begin to see the popcorn ceiling begin to lift and separate from the drywall. |
 |
If you feel it is necessary, apply a second coat of paint after the first coat has thoroughly dried.
Once you have repainted the popcorn ceiling remove the masking tape, and if necessary reattach the light fixtures, vents and electrical fixture covers.
Finally roll up the drop clothes and you’re finished. You’ve completed your first popcorn ceiling repainting job.
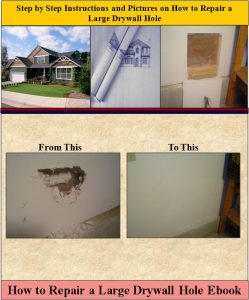
For information on repairing a large drywall hole, see the “How to Repair a Large Drywall Hole” Ebook from HomeAdditionPlus.com. The “How to Repair a Large Drywall Hole” Ebook provides step-by-step instructions on how to repair your damaged wall so that it looks as good as new.
See HomeAdditionPlus.com’s Drywall Calculator
Related Information
- How to Repair a Drywall Ceiling
- How to Texture a Ceiling
- How to Repair a Water Stained Drywall Ceiling
Additional Drywall Installation Resources from Amazon.com
 |
 |
Free Home Addition Price Quotes with No Obligation!
Fill out our 3-5 minute quick and easy form, and receive a free price quote on a house addition from one of our prescreened and licensed home addition contractors. This process is free and there is no obligation to continue once you receive your house addition price estimate.