How to Repair Cracked Drywall Seams like the Pros
By Mark J. Donovan
|
|
Cracked drywall seams are a common problem in both old and new homes. Fortunately fixing a cracked drywall seam is easy to do. Drywall seams can crack for a number of reasons. They can occur because of a settling foundation.
Or, if you live in a region where there are extreme temperatures changes throughout the year, expansion and contraction of the house framing can cause cracked drywall seams. They can also form if the drywall taping and mudding was done improperly or if there were insufficient drywall screws or nails used when installing the drywall panels. |
Regardless of the reason it is fairly easy to repair a cracked drywall seam. See this video to watch how to fix a drywall seam crack.
To fix a cracked drywall seam use a utility knife to score a line over each end of the drywall tape in the affected area. Make sure the lines extend just beyond the cracked drywall seam. Then use your utility knife to lift up and remove the old drywall tape.
| Cut a length of new drywall tape to replace the old drywall tape you just removed.
Using a drywall taping knife, apply all purpose joint compound (mud) over the cracked drywall seam area. Next, again using your drywall taping knife, imbed the new piece of drywall tape into the joint compound so that you cover the seam. Use your drywall taping knife to fully work the tape into the joint compound, however be careful to not press all of the joint compound out from behind the tape. Otherwise the drywall tape will peel off of the seam in short order. |
 |
Apply a thin coat of joint compound over the drywall tape and then let the seam dry. You do not have to be perfect at this point, as you will be sanding the seam and applying additional skim coats of joint compound later on. Watch how to tape and mud drywall here.
| After applying the first coat of mud, you’ve completed the first stage in fixing a cracked drywall seam.
After the seam has dried, use sand paper or a drywall screen and lightly sand over the edges and surface of the repaired drywall seam. Basically you want to remove any high ridges on the seam. Next, apply another coat of mud over the drywall taped seam, however this time flare it out a few inches on either side of the seam. You want to begin blending in the repaired drywall seam into the surrounding wall area. Again, let this second coat of mud dry. |

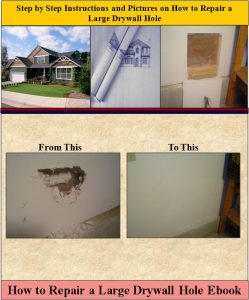
Get this drywall repair eBook, for detailed instructions and helpful pictures to repair your drywall hole. |
After the second coat of mud has dried, again lightly sand over the edges and any ridges, and then apply one final coat of mud.
Again, this time spread the seam out another couple of inches wider. Let this coat fully dry and then lightly sand one last time.
For the final stage of fixing a cracked drywall seam apply a primer and then paint over the seam.
For information on repairing a large drywall hole, see the “How to Repair a Large Drywall Hole” Ebook from HomeAdditionPlus.com. The “How to Repair a Large Drywall Hole” Ebook provides step-by-step instructions on how to repair your damaged wall so that it looks as good as new.
See HomeAdditionPlus.com’s Drywall Calculator
Related Information
- Detailed Drywall Installation Instructions
- How to Make Large Drywall Hole Repairs
- How to Patch Drywall Nail Pops
Additional Drywall Installation Resources from Amazon.com
 |
 |
Free Home Addition Price Quotes with No Obligation!
Fill out our 3-5 minute quick and easy form, and receive a free price quote on a house addition from one of our prescreened and licensed home addition contractors. This process is free and there is no obligation to continue once you receive your house addition price estimate.

