Tips on Installing a Leak Free Shower Tray and Enclosure
By Mark J. Donovan
|
|
Installing an additional shower in your house can be a difficult and expensive endeavor due mainly to having to install new plumbing supply and drain lines. However, if you’re ready for a challenge, and can afford the cost of the plumber to at least install the plumbing lines, then you can install your own shower tray and enclosure with little difficulty. If you plan to install a shower tray and enclosure where a tub use to reside then you’ll simplify your costs and work immensely.
Choosing a Shower Tray and Enclosure There are many styles and sizes of shower trays and enclosures to choose from. You can buy shower trays and enclosures that are square, rectangular, and even triangular in shape. |
Virtually all shower tray and enclosures are manufactured out of fiberglass. For the most durable type of shower tray and enclosure I suggest buying a unit that is made from acrylic and filled with a heavy weight resin. In the end, buy a shower tray and enclosure that allows you to comfortably stand in the shower and have room to wash. Also makes sure the shower tray has a non-slip surface to prevent slipping in it.
| Installing Shower Tray and Enclosure
If you are installing a shower tray and enclosure into an existing tub or shower area, you’ll also want to make sure that you buy the right types such that the drain hole of the shower tray lines up with the existing drain, and that similarly the shower enclosure faucet holes line up with the existing plumbing supply lines. If you’re installing new plumbing, then I would suggest choosing the shower tray and enclosure first and then having your plumber appropriately locate the drain and supply lines. |
 |
For the actual shower tray and enclosure installation, always install the shower tray first. The shower enclosure should then be installed into/on top of the shower tray. This will help to ensure a leak free shower unit, after caulking around it per the shower tray and enclosure manufacturer’s installation instructions. Not that it is critical that the silicone sealant be applied around the shower tray, where the base of the enclosure abuts it.
Finally, after the caulk has fully cured, use a water spray bottle to check and test the shower tray and enclosure wall seams for any water leaks.
For help on your bathroom remodeling project, see my Bathroom Remodeling Bid Sheet. The Bathroom Remodeling Bid Sheet provides a request for quote checklist section that you can provide to prospective bathroom remodeling contractors. It also includes a comprehensive bathroom remodeling cost breakdown table, in Microsoft Excel format, that allows the contractor to include his projected remodeling costs for every phase of the project.
Related Information
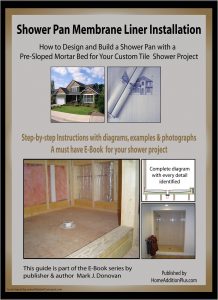
- How to Install a Mortar Shower Pan Membrane Liner eBook
- How to Tile a Custom Ceramic Tile Shower eBook
- Glass Shower Door Advantages
Additional Bathroom Remodeling Design Resources
 |
 |
Get Free Bathroom Remodeling Price Quotes with No Obligation!
Fill out our 3-5 minute quick and easy form, and receive a free price quote on bathroom remodeling from one of our prescreened and licensed bathroom remodeling contractors. This process is free and there is no obligation to continue once you receive your bathroom renovation price estimate.

