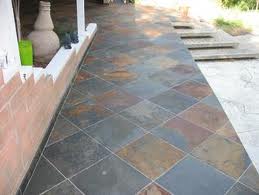
Update Your Dull Concrete Patio or Walkway with Colorful Outdoor Tiles
By Mark J. Donovan
|
|
One way to rejuvenate and add color to a cement patio or walkway is to install outdoor tiles over it. Installing outdoor tiles is easy to do, even for the only moderately skilled weekend do it yourselfer. Porcelain tiles work best for outdoor tiling projects due to the fact that they are made from more refined material, and are denser and harder than ceramic tiles. When tackling an outdoor tile installation project it is wise to buy or rent a tile wet saw for cutting tiles. You’ll save a great deal of time and money by doing so, and you’ll achieve a much more professional job.
Before starting an outdoor tiling project, make sure that the concrete surface is clean and free of all types of dusts and sealers. Also, fill in any cracks with thinset mortar to ensure you have a perfectly smooth tiling surface. |
When buying outdoor tiles make sure you allow for cutting wastage. I always recommend buying about 10% more tile material than the measurements dictate. This way you’ll have enough tiles to complete the entire job, and a few spares to store in case of tile breakage down the road.
| Always purchase thinset mortar or adhesive per the outdoor tile manufacturer’s recommendations. This said, Flexbond thinset mortar works best for most outdoor tile projects. Again, mix the thinset material according to the manufacturer’s directions.
When starting the outdoor tile patio or walkway installation project, make sure to begin in an area where you have room to work your way outwards from the project. For example if you’re doing an outdoor tile installation on a patio next to a home, start the project at the house and work your way outwards. This way you won’t find yourself having to walk on your freshly placed tiles. |
 |
As with any tile flooring project start by snapping perpendicular chalk lines with their intersection in the middle of the patio or walkway area. I also recommend snapping additional parallel chalk lines every 12 to 24 inches or so to act as references lines as you place tiles.
Starting in the middle of the floor area, at the two main intersecting chalk lines, apply thinset to the concrete slab using a notched trowel. The notch size will vary with the size of the outdoor tiles you’re installing, however as a general rule the larger the tile the larger the notches should be.
| Once you’ve applied approximately 9 to 12 square feet of thinset to the patio area begin to place your outdoor tiles into the thinset. Continue this same process working your way outwards until all of the outdoor tiles have been installed.
After the tiles have had 24 to 48 hours to set up, mix up a bucket of grout per the grout manufacturer’s recommendations and then using a rubber float work the grout into the tile joints. Make sure after grouting 9 to 12 square feet of tile area wipe down the grouted tiles with a sponge and clean water. Keep a large bucket with clean water in it nearby so that you can frequently rinse out the sponge as you clean the excess grout off the outdoor tiles. |
 |
Continue this process until all of the outdoor tiled area has been grouted. Then go back and wipe the tiles down again with fresh clean water and a sponge. You may need to repeat the cleaning process several times before the grout has been fully removed off of the tiles. Cheese cloth also helps to remove any residual grout film off of the tiles.
After the grout has had 3 days to fully cure, apply a high quality grout sealer to the grout to protect it from staining. And with that, you’re outdoor tile installation project is complete!
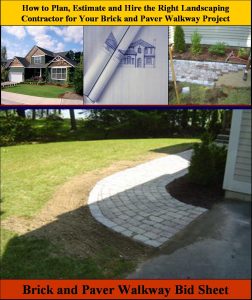
Planning to have a Brick or Paver Walkway installed by a Landscaping Contractor but not sure what questions to ask to ensure you hire the right one? See HomeAdditionPlus.com’s Brick and Paver Walkway Bid Sheet. The Brick and Paver Walkway Bid Sheet will help ensure that your walkway project goes smoothly and you get the finished walkway you are looking for.
See HomeAdditionPlus.com’s Ceramic Tile Calculator
See my “How to Tile a Custom Ceramic Tile Shower” Ebook to learn how to tile your own shower: For a detailed set of instructions on tiling a shower floor and walls, including pictures for every step in the process, see my “How to Tile Custom Ceramic Tile Shower Ebook”.
Related Information
Additional Ceramic Tile Resources from Amazon.com
 |
 |
 |
Get Free Bathroom Remodeling Price Quotes with No Obligation!
Fill out our 3-5 minute quick and easy form, and receive a free price quote on a bathroom remodeling project from one of our pre-screened and licensed bathroom remodeling contractors. This process is free and there is no obligation to continue once you receive your bathroom addition price estimate.