How to Install a Shower Drain for Fiberglass and Mortar Shower Pans
By Mark J. Donovan
|
|
Installing a shower drain needs to be done right the first time. The last thing you want is to have a leaky shower drain, particularly if the shower is located on an upper floor.
One screw up and you may end up spending thousands of dollars on water damage repairs. A shower drain installation project includes the installation of a shower pan and the drain itself. |
Shower collector pans can be pre-fabricated acrylic fiberglass units or custom built ones using mortar. No matter the type of shower pan, all are designed with a slight bank to direct water from the shower walls towards the drain, normally located in the center of the shower collector pan.
If you’re purchasing a pre-fab’d shower pan for a replacement project, make your life easier by choosing one that has its drain hole located exactly where the original shower drain unit was located. This way you won’t have to modify the existing plumbing trap that sits underneath the shower collector pan.
| One of the two critical tasks in a shower drain installation project is to ensure a perfect seal between the shower collector pan and the drain itself.
The second critical task is to ensure that the shower drain is perfectly sealed with the trap located under the shower floor. It’s also vitally important that the shower drain is mounted so that it is perfectly rigid. Any flexing of the shower drain will inevitably lead to leaks down the road. |
 |
How to Install a Shower Drain that Won’t Leak
To create a perfect seal between a fiberglass shower pan and the plumbing drain pipe, a thick and flexible coupling sleeve piece is inserted over the shower drain pipe.
The coupling piece compresses as the shower pan is pushed over it and the drain pipe, which helps to create the water tight seal. A gasket is also attached between the drain cap and the coupling piece / drain pipe. By fastening the screws associated with the drain cap, and through the gasket, a water tight seal is created between the shower pan and the drain pipe.
| For mortar shower pans, an adjustable shower drain is used. The base of the adjustable drain is first attached to the shower drain pipe using plumbers cement.
It has a flange on it that normally sticks up about ¼ of an inch above the base of the bare shower pan floor (pre-mortar stage). The adjustable shower drain head then screws down into the base portion. However, it is not actually installed until the mortar shower pan is nearly completed. Mortar is then installed into the base of the shower floor to the point where it is flush with the top edge of the base flange. |

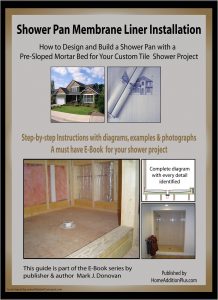
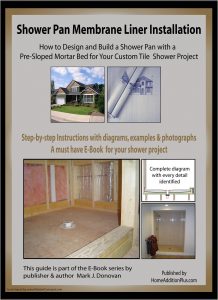
Get this “How to Install a Mortar Shower Pan” ebook, that provides detailed instructions and pictures. |
The mortar also has to be thicker as it nears the shower walls to create the appropriate pitch for the water to funnel towards the drain. A shower pan membrane liner is then installed over the pre-slope mortar layer. The lining material rests over the top of the drain hole flange, and a hole is then cut into it for water to drain into the shower drain.
A bead of silicone caulk is placed around the rim of the drain hole (on the underside of the liner) and a cap piece associated with the adjustable shower drain is then screwed down onto the base flange assembly.
| The adjustable shower head is then installed into the flange and small pea stones are placed around the weep holes associated with the adjustable shower drain.
Note that the shower head is adjusted so that the top of the head will sit flush with the expected final height of the tiled shower floor surface. |
|
Install Final Mortar Shower Pan Layer
Lastly, the final layer of mortar is poured onto the shower floor. The trick is to maintain the slope while troweling out this mortar layer.
And that’s all there is to it for your shower drain installation project. It’s not that difficult, however make sure you don’t skip any steps. Otherwise you’ll find yourself tearing up the shower pan and redoing your work.
For information on installing a shower pan membrane liner for a ceramic tile shower, see the Shower Pan Membrane Liner Installation eBook from HomeAdditionPlus.com. The Shower Pan Membrane Liner EBook will quickly teach you the step-by-step process for installing the shower pan membrane liner correctly. It includes instructions on framing the shower stall, pouring the pre-slope and shower base mortar, and installing the shower pan membrane liner.
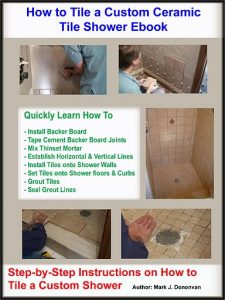
For information on how to tile a custom ceramic tile shower, see the “How to Tile a Custom Ceramic Tile Shower eBook” from HomeAdditionPlus.com. This eBook will quickly provide you with step-by-step instructions on how to measure and install ceramic tile in a shower, including the installation of tile on shower walls, floors and curbs. It provides detailed instructions for every step in the process of tiling a custom ceramic tile shower and is loaded with instructional pictures!
Related Information
- How to Install a Handheld Showerhead Unit Video
- How to Install a Mortar Shower Pan Video
- How to Fix a Shower Leak
Additional Plumbing Resources from Amazon.com
 |
 |
Get Free Bathroom Remodeling Price Quotes with No Obligation!
Fill out our 3-5 minute quick and easy form, and receive a free price quote on a bathroom remodeling project from one of our pre-screened and licensed bathroom remodeling contractors. This process is free and there is no obligation to continue once you receive your bathroom addition price estimate.


