Step-by-Step Instructions for Removing a Kitchen Faucet
By Mark J. Donovan
|
|
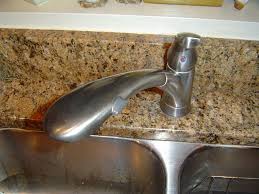
Removing a kitchen faucet can be a challenge as the under-counter supporting nuts are often difficult to reach. The first step in removing a kitchen faucet is to check under the kitchen sink to see how the faucet is attached to the kitchen countertop.
In particular take a close look at the nuts that are holding the faucet in place to the kitchen countertop. Sometimes they can be nearly impossible to get to. If from your observation this situation appears to be the case you will need a faucet wrench (a.k.a. basin wrench) to remove the nuts. |
A faucet wrench, or basin wrench, is comprised of a long handle with an adjustable serrated jaw at one end of it to grab onto the faucet nuts. The jaw sits 90 degrees to the long handle to allow it to slide up into the tight quarters under the kitchen sink and grab onto the kitchen faucet nuts.
| Also when removing a kitchen faucet, check the top of it for any nuts that may be holding the faucet in place to the kitchen sink.
Before removing a kitchen faucet first turn the hot and cold water supply valves to the off position. Normally these valves are located in the kitchen cabinet right under the sink. Then turn the kitchen faucet handles to the on position to ensure that water is indeed off to the faucet. |
 |
Next, disconnect the hot and cold water supply line hoses from the hot and cold water shut off valves using an adjustable wrench. You may want to have a bucket handy to catch the bit of water that drains from the two hoses.
Don’t worry about disconnecting the hoses from the base of the kitchen faucet itself. You can do that later after removing the kitchen faucet.
If your kitchen faucet has a separate spray line, disconnect it as well.
After removing the old kitchen faucet, clean the countertop area where the old faucet was located to remove any old plumbers putty and grime. Then install the new faucet in the opposite order of removing the old kitchen faucet while also following the new faucet manufacturer’s directions. One key tip, make sure to attach the hot and cold supply line hoses to the new kitchen faucet prior to mounting the new kitchen faucet to the kitchen sink. You’ll save yourself some significant headaches.
For information on installing a shower pan membrane liner for a ceramic tile shower, see the Shower Pan Membrane Liner Installation eBook from HomeAdditionPlus.com. The Shower Pan Membrane Liner EBook will quickly teach you the step-by-step process for installing the shower pan membrane liner correctly. It includes instructions on framing the shower stall, pouring the pre-slope and shower base mortar, and installing the shower pan membrane liner.
For information on how to tile a custom ceramic tile shower, see the “How to Tile a Custom Ceramic Tile Shower eBook” from HomeAdditionPlus.com. This eBook will quickly provide you with step-by-step instructions on how to measure and install ceramic tile in a shower, including the installation of tile on shower walls, floors and curbs. It provides detailed instructions for every step in the process of tiling a custom ceramic tile shower and is loaded with instructional pictures!
Related Information
Additional Plumbing Resources from Amazon.com
 |
 |
Get Free Bathroom Remodeling Price Quotes with No Obligation!
Fill out our 3-5 minute quick and easy form, and receive a free price quote on a bathroom remodeling project from one of our pre-screened and licensed bathroom remodeling contractors. This process is free and there is no obligation to continue once you receive your bathroom addition price estimate.

