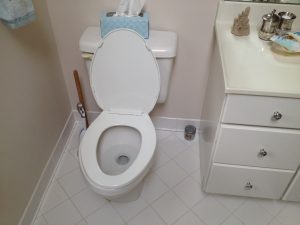
Simple Instructions for Installing a Toilet in Less than One Hour
By Mark J. Donovan
|
|
If your toilet has a hairline crack in it and is leaking, or it is old and damaged in some other way, then you really have no other choice but to install a new toilet. Installing a toilet doesn’t require the skill of a plumber if you have a couple of basic tools, a towel, and a little muscle. Most moderately skilled DIY homeowners can install a toilet in about one hour of effort.
Buying New Toilet When you buy your replacement toilet, note that you are buying both the toilet bowl and the toilet tank. |
Consequently make sure when buying the new toilet that it includes all the necessary gaskets, washers, toilet seat, and other hardware necessary for assembling the toilet.
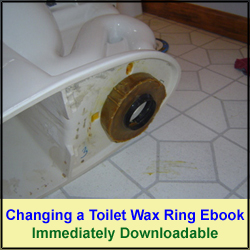
Most toilet manufacturers include these items with the toilet tank and bowl. Also, make sure to pick up a toilet wax gasket ring. This item ensures an airtight seal between the base of the toilet and the toilet flange that sits in the floor.
For tools you’ll need a pair of channel lock pliers, a bucket, a screw driver, a putty knife, a small paper cup, and a large towel.
| Removing Old Toilet
First turn off the water to the toilet tank and flush the toilet to drain the bowl. Next, disconnect the end of the supply line pipe that is connected to the base of the toilet tank. You may need your channel lock pliers to loosen the nut. Make sure to position your bucket underneath the nut so any residual water in the tank drains into the bucket. Then use the small paper cup to empty any residual water out of the toilet bowl. |
 |
Next remove the two nut cap covers and nuts that are attached to the two long vertical toilet flange bolts.
Finally, lift the entire toilet upwards and carry it out of the bathroom. Alternatively you can remove the screws that hold the tank to the bowl so that you can take the tank and bowl out separately.
Installing Toilet Bowl
First remove any of the old toilet wax ring material from around the flange using your putty knife and install the new wax ring. If the wax ring has a tapered side, install the wax ring with the flat side facing upwards. Then install the new ¼” in diameter flange bolts into the side holes of the flange.
| Next place the toilet bowl over the toilet flange making sure the bolts slide up through the two bolt holes on either side of the toilet. You may want to sit directly over the toilet bowl, facing the wall, to help rock the toilet bowl flush down on the floor and to create a perfect seal with the wax ring.
Then install the washers and nuts over the bolts and tighten them up very gently. It’s important to not over-tighten them as otherwise you may crack the toilet bowl. |
 |
Once the toilet is operational check again that the bolts are snug downed, but again not over-tightened.
Installing Toilet Tank
Next install the 2” rubber gasket onto the toilet tank, as well as the rubber washers for the bolts that hold the toilet tank to the bowl.
Then lift up the tank and place it over the toilet bowl so that the bolt holes line up with one another between the two sections of the toilet. While sitting on the toilet facing the wall insert the two large bolts down into the tank and through the bowl bolt holes. Place metal washers and nuts on the ends of the bolts, underneath the toilet tank/bowl connection, and tighten them up. Again, do not over-tighten the bolts. You’ll will need a large flat head screw driver and channel lock pliers to tighten up these bolts.
| Installing Toilet Fill Valve and Connecting Supply Line
Install the toilet tank fill valve and toilet tank handle into the toilet tank and attach the supply line to the underside of the toilet bowl. Again you’ll need your channel lock pliers to do this. Finally turn water back on to the toilet and allow the toilet to fill up. Flush it and confirm that there are no leaks, and that it flushes properly. |
|
If the toilet rocks in any way install a shim where necessary under the toilet bowl. If the floor is flat, and the toilet is installed properly a shim should not be required. That said, tiled bathroom floors are not always perfectly flat. And with that, you’ve installed your new toilet.
For information on installing a shower pan membrane liner for a ceramic tile shower, see the Shower Pan Membrane Liner Installation eBook from HomeAdditionPlus.com. The Shower Pan Membrane Liner EBook will quickly teach you the step-by-step process for installing the shower pan membrane liner correctly. It includes instructions on framing the shower stall, pouring the pre-slope and shower base mortar, and installing the shower pan membrane liner.

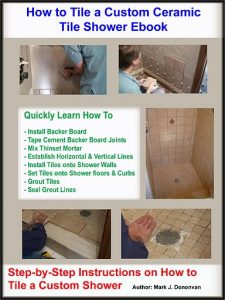
For information on how to tile a custom ceramic tile shower, see the “How to Tile a Custom Ceramic Tile Shower eBook” from HomeAdditionPlus.com. This eBook will quickly provide you with step-by-step instructions on how to measure and install ceramic tile in a shower, including the installation of tile on shower walls, floors and curbs. It provides detailed instructions for every step in the process of tiling a custom ceramic tile shower and is loaded with instructional pictures!
Related Information
Additional Plumbing Resources from Amazon.com
 |
 |
Get Free Bathroom Remodeling Price Quotes with No Obligation!
Fill out our 3-5 minute quick and easy form, and receive a free price quote on a bathroom remodeling project from one of our pre-screened and licensed bathroom remodeling contractors. This process is free and there is no obligation to continue once you receive your bathroom addition price estimate.