Taping and Mudding Drywall Made Easy
By Mark J. Donovan
|
|
Taping and mudding drywall to some extent is an art that takes some practice. However, most DIY homeowners can tackle a small taping and mudding drywall project if they first get the right tools and get a little upfront training.
Install the Drywall properly In order to perform a quality taping and mudding drywall job you first have to make sure that the drywall is hung properly. If you are installing drywall in a room, first install the drywall on the ceilings. |
Then install the drywall on the walls starting at the top with the first row, and then working your way to the floor with a second row of drywall, assuming your walls are 7.5 to 8 feet in height. The drywall seams should be minimized to help ensure a quality finished wall look.
Note that it is important that the tapered ends of the drywall butt up against each other so that they create a slight depression line half way up the wall. This depression area enables the tape and mud to be liberally applied over the joint without creating too high of a bulge.
Taping and Mudding Drywall
First Coat
If you are using drywall paper tape, apply a small skim coat of mud over the joints before applying the tape.
If you are using the sticky fiberglass tape, you can apply it directly to the drywall seams and joints.
Once the tape has been applied to a seam or joint. Apply a thin coat of mud over the tape and seam/joint.
Use a 6” broad knife to apply the mud and run it down the tapeline with long continuous strokes. Do not run the knife perpendicular with many strokes.
This will create many vertical lines that will need to be sanded. Once you have applied the first coat of mud let it dry.
Basically you want to build up the seam/joint area with a little extra mud to fully cover the tape.
Note that this second coat should spread out the seam such that it is approximately 10 inches in width.
Again let this second coat dry.
Third Coat
Before applying the third coat of drywall mud use your 6” knife and knock off any high spots or burrs on the drywall seam.
Now apply a skim coat of drywall mud over the seam, again fanning the seam out slightly wider than the previous application of drywall mud. The purpose of this coat is to feather out the seam and fill in any miniscule cracks or lines in the existing drywall mud seam.
Again let this third coat dry.
Sanding Mud Seams and Joints
The best way to sand the seams and joints is to use a drywall pole sander. A pole sander is about 4 feet long and has a flexible 3.25”x9” head on it that you apply drywall mesh sheets to. You can also use a drywall hand sander as well.
When sanding the seams and joints make long strokes with the pole or hand sander in a direction that is parallel to the seam/joint. Apply less pressure to the middle of the seam and more toward the edges.
It is important that you sand the edges of the seam so that they completely feather out to a smooth finish with the un-mudded drywall. As you near the edges of the seam, you can turn the angle of your pole sander such that it is on a 30-45o angle.
Preparing walls for Primer and Paint
Once you have sanded all of the seams and joints, wipe the walls down with a slightly damp rag to remove the drywall mud dust.
Next apply a coat of primer.
Then apply a couple of coats of paint, and your walls are ready for trim.
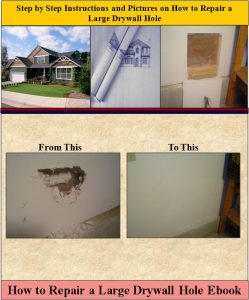
For information on repairing a large drywall hole, see the “How to Repair a Large Drywall Hole” Ebook from HomeAdditionPlus.com. The “How to Repair a Large Drywall Hole” Ebook provides step-by-step instructions on how to repair your damaged wall so that it looks as good as new.
See HomeAdditionPlus.com’s Drywall Calculator
Related Information
Additional Drywall Installation Resources from Amazon.com
 |
 |
Free Home Addition Price Quotes with No Obligation!
Fill out our 3-5 minute quick and easy form, and receive a free price quote on a house addition from one of our prescreened and licensed home addition contractors. This process is free and there is no obligation to continue once you receive your house addition price estimate.


