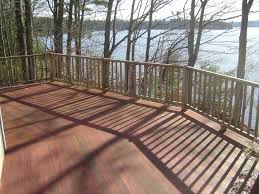
By Maintaining a Deck Regularly You Can Dramatically Extend its Life and Keep it Always Looking Like New
By Mark J. Donovan
|
|
Spring is the perfect time of the year to do a deck maintenance check. Winter can wreak havoc on a deck. Snow and ice, as well as frost heaves and ultraviolet sunlight, can damage the deck surface and framing members. For example, if the snow was left on the deck all winter the acid in the snow and ice can eat away at the deck finish turning the deck surface dull and grey, and leaving it vulnerable to moisture and ultraviolet sunlight damage.
By running through a wood deck maintenance checklist in the spring you can keep your deck looking like new and prevent major damage and repair costs down the road. |
The best time to run through your deck maintenance checklist is when you’re pulling out your grill from winter hibernation. Summarized below is a list of my recommendations on performing a wood deck maintenance check.
| Check Deck Finish
Check the deck finish for fading, peeling, and splotching. Also look for signs of mold and mildew growth. Any sign of these types of conditions is a sure indication that the deck is in need of a new coat of stain or sealer. For best results apply a similar stain or sealer that was previously applied to the deck. When refinishing a deck make sure to clean it thoroughly before applying a stain or sealer. A garden hose, a long handled stiff broom, and deck cleaning solution work best for cleaning a deck. |
 |
If there are signs of mold and mildew growth, scrub a highly diluted solution of bleach onto the deck surface to kill the mold and mildew spores. If the deck still looks a little dull after cleaning it consider applying a deck brightener before applying the deck stain or sealer.
Replace any damaged boards and fasten them down with new non-corrosive fasteners. If there are loose wood decking boards apply new deck fasteners, (e.g. screws or nails) right next to the original deck fasteners that have given way. You may want to actually replace the failed fasteners with the new ones. Also make sure to inspect the underside of the decking boards for rot and mold and mildew growth.
Make sure to also inspect the deck surface for dry rot. Moreover check underneath potted plants and other objects that have been sitting on the deck all winter. Often dry rot starts in these places.
| Inspect Deck Framing
Make sure to look under the deck if at all possible and inspect the deck joists, the ledger board, and the posts. Make sure there is no rot and that the ledger board has not pulled away from the home. Heavy snow and ice left on the deck can often cause the deck to pull away from the home. Also make sure the deck posts are straight and still mounted properly to the deck footings or piers. Inspect Deck Railings and Stairs Make sure the deck railings are still fastened together well. Often deck railings, posts, and balusters can become loose or separated from one another. |
|
Make sure they are still properly fastened as the last thing you want is for someone to lean up against the deck railing and it give way.
Also check the deck stairs to make sure the treads are still fastened well to the stair risers and that the base of the stairs is still level. If the base of the stairs is resting on cement blocks, frost heaves can cause it to become unlevel as the soil unthaws. This can cause the stair risers to twist and the stair treads to slope significantly to one side.
After completing the wood deck maintenance checklist and jotting down notes of items that need work, make sure not to procrastinate in making the necessary repairs. The sooner you can make the repairs the better off your deck, and your savings account, will be. By regularly maintaining your deck you can extend its life dramatically and keep it always looking like new.
For help on building a deck, see HomeAdditionPlus.com’s Deck Installation Bid Sheet. The Deck Installation Bid Sheet will teach your how to hire the right deck contractor, and help to ensure that your deck project is completed on time and budget.
Related Information
- Deck Staining Tips
- How to Remove Tree Sap from Decking Boards
- How to Choose the Right Deck Stain Type
Additional Deck Building and Design Resources
 |
 |
Get Free Deck Building Price Quotes with No Obligation!
Fill out our 3-5 minute quick and easy form, and receive a free price quote on decks from one of our pre-screened and licensed deck contractors. This process is free and there is no obligation to continue once you receive your decks price estimate.

