Restore Your Bathroom’s Wall Tile to its Original Beauty and Luster
By Mark J. Donovan
|
|
Regrouting bathroom wall tile is a great way to breathe new life into your bathroom at an affordable cost. Just because the bathroom wall tile grout has seen its better days doesn’t necessarily mean you need to outright replace the bathroom wall tile. With a little time and a power grinder you can remove the old wall tile grout and then regrout and polish your bathroom tiled walls to restore them to their original luster. When removing grout always make sure to wear eye protection. Bits and pieces of old grout and grout dust fly everywhere.
At the heart of every tile regrouting project is the actual grout removal process. It can be a slow and arduous process, particularly if only using a grout saw. |
However, you can immensely simplify removing grout by using a dremel tool and a grout removal kit that attaches to it. The grout removal kit consists of a carbide drill bit and a guide assembly that attaches to the end of the dremel tool. The carbide bit chews away at the grout while the guide helps to prevent chipping the tile edges. Though the dremel tool and grout removal attachment dramatically speed up the grout removal process, you’ll still need to use a grout saw to touch up and clean out the corner joints and edges.
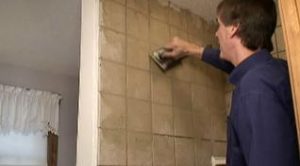
Once you’ve regrouted a section of the bathroom wall tile, e.g. a 3’x3’ area, use a clean damp sponge and gently wipe away any of the excess grout from the tile surface. Make sure to have a bucket of water nearby so that you can frequently rinse the sponge. Continue in this process until you’ve completed regrouting the entire bathroom wall tile.
| Once you’ve regrouted the entire bathroom wall tile, go back and wipe down all the wall tiles again with the damp sponge.
Wait another 15 to 20 minutes, and again wipe down the wall tiles with the damp sponge. Again, it’s important to keep a clean bucket of water nearby so that you can rinse the sponge frequently. After the tile grout has set up for 24 hours, wipe down the bathroom wall tiles with cheese cloth. The cheese cloth will polish the tiles and remove any residual grout dust on the tiles. |
 |
Finally, apply a grout sealer to the tiles to complete the bathroom wall tile regrouting project.
For information on installing a shower pan membrane liner for a ceramic tile shower, see the Shower Pan Membrane Liner Installation Ebook from HomeAdditionPlus.com. The Shower Pan Membrane Liner EBook will quickly teach you the step-by-step process for installing the shower pan membrane liner correctly. It includes instructions on framing the shower stall, pouring the pre-slope and shower base mortar, and installing the shower pan membrane liner.
See HomeAdditionPlus.com’s Ceramic Tile Calculator
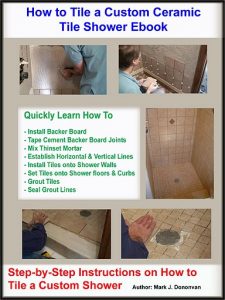
See my “How to Tile a Custom Ceramic Tile Shower” Ebook to learn how to tile your own shower: For a detailed set of instructions on tiling a shower floor and walls, including pictures for every step in the process, see my “How to Tile Custom Ceramic Tile Shower Ebook”.
Related Information
- How to Grout Shower Tile Walls Video
- Bathroom Ceramic Tile Options and Considerations
- How to Install Ceramic Floor Tile
Additional Ceramic Tile Resources from Amazon.com
 |
 |
 |
Get Free Bathroom Remodeling Price Quotes with No Obligation!
Fill out our 3-5 minute quick and easy form, and receive a free price quote on a bathroom remodeling project from one of our pre-screened and licensed bathroom remodeling contractors. This process is free and there is no obligation to continue once you receive your bathroom addition price estimate.

