Protect Sheetrocked Garage Walls with Texture 111 Plywood
By Mark J. Donovan
|
|
If your garage walls are sheetrocked chances are they are scuffed with various marks. In some cases, there may even be a few holes in the drywall from accidentally banging the walls with items such as a sit down lawnmower. Ok, I admit it; there is a metal bar that extends out beyond my lawnmower that has occasionally seen the backside of my garage drywall.
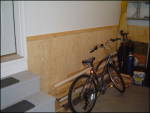
To eliminate the damaged look of a sheetrocked garage, I recently installed texture 111 on the lower half of the walls. The result, my garage walls now look as if I have installed wainscoting on them, and are now somewhat immune from the everyday beating of objects banging up against them. |
For those who are not familiar with texture 111, it is a tongue and grooved plywood type product that has on its front surface a finished textured look. It typically comes in widths and lengths of 4’ x 8’, respectively. In addition, approximately every 8 inches, there is a ½” channel that runs the width of the board. The panels come in either 3/8th or 5/8th thicknesses.
| To install texture 111 on the lower half of my garage walls, I used a skill saw and ripped the material in half to create two 4’x4’ sheets.
Next I installed the textured 111 over the drywalls such that the channels ran vertically. Since textured 111 has tongue and grooved edges, there are no visible seams when you butt them together. In addition, you can apply the nails in the tongue area of the material to hide nails. Just make sure you nail into wall studs. In the process of installing the textured 111, use a level across the top to make sure the panels do not gradually walk up or down the garage wall as you continue to install them. |
 |
Alternatively, you may also want to consider making marks 4’ up the walls ahead of time and snapping a line to eliminate the constant checking with a level.
| After installing the texture 111 on the garage walls, I then used some old 1”x3” strapping wood to cap off the top of the panels. I used a table saw to notch out a 3/8” x 3/4” inch deep channel in the backside of the strapping so that it would overlap the top of the texture 111 material by about 1”. Along the bottom of the panels, I installed baseboard trim.
In just a few hours of work, I had a garage that looked as if I was standing in a formal dining room. But even more exciting was now I had walls that were protected against dings from all my garage toys. |
 |
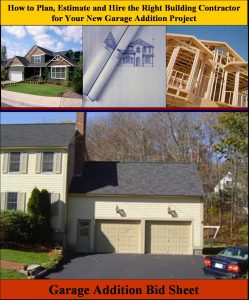
For more information on building a garage addition see the Garage Addition Bid Sheet from HomeAdditionPlus.com. The Garage Addition Bid Sheet includes an extensive questionnaire (Request for Quote) that a homeowner can provide to prospective general contractors and subcontractors for bidding the garage addition. In addition, the Garage Addition Bid Sheet also includes estimated costs and time intervals for constructing a garage addition as well as a list of key home material manufacturers. Finally, the Garage Addition Bid sheet includes an extensive set of helpful tips and advice on making sure the garage addition is built properly and on time and budget.
Related Information
Free Garage Addition Price Quotes with No Obligation!
Fill out our 3-5 minute quick and easy form, and receive a free price quote on a garage addition from one of our prescreened and licensed garage addition contractors. This process is free and there is no obligation to continue once you receive your garage addition price estimate.