How to Install Crown Molding Cost Effectively
By Mark J. Donovan
|
|
Installing crown molding is becoming a popular trend with today’s homeowners. However homeowners choosing not to hire a finish contractor to install it must first learn how to install crown molding the right way before embarking on such a project. Jumping into such a project without first learning how to install crown molding can be fraught with danger as it can lead to a pile of crown molding scrap and a heavily depleted banking account.
Crown molding is expensive, particularly hardwood crown molding, so it is imperative to know how to cut crown molding and install it correctly before beginning such a project. |
There are a number of key how to install crown molding tips for homeowners to know. I have outlined them in the following sections below.
Keep your Crown Molding Installation Project Simple
First, if you have never installed crown molding before, keep your first crown molding installation project small.
Your first crown molding installation project should be targeted to a small room. You should also limit the crown molding installation project to just the crown molding stock itself, and forego the idea of including additional underboard stock or other accent trim pieces to the base crown molding.
Cut Crown Molding Properly
Knowing how to cut crown molding correctly is critical in preventing an expensive crown molding waste pile. Cutting crown molding requires the use of a miter saw and a coping saw. When cutting crown molding on a miter saw you must cut it backwards and upside down so that it will install right side up on the wall and ceiling. When you need to cope cut crown molding, first cut the crown molding end at a 45o angle with a miter saw, and then back-cut it with a coping saw.
With these tips on how to install crown molding you should now have the basics to begin a crown molding installation project. If there is any one tip that is more important than the rest, it is the need to practice making crown molding cuts on scrap material before cutting the actual pieces. Good luck with your crown molding project.
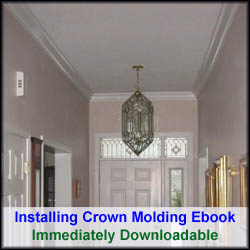
Dress Up Your Home with Crown Molding – For specific instructions on installing crown molding see the “Installing Crown Molding Ebook“. The “Installing Crown Molding Ebook” will show you how to properly measure, select, cut and install crown molding like a professional carpenter. It provides detailed instructions on every step in the process of installing crown molding and includes 28 instructional pictures! Order and Immediately Download today!. 100% Money-Back Guarantee if you are not satisfied.
For information on installing Window and Door trim see HomeAdditionPlus.com’s Installing Interior Window Trim Ebook and Installing Interior Door Trim Ebook. These Ebooks are loaded with pictures and provide easy to understand, step-by-step instructions, on how to install interior window and door trim.
Related Information
- How to Install Crown Molding Video
- Detailed Instructions on Installing Crown Molding
- How to Use Crown Molding Corner Blocks
Additional Finish Carpentry Resources from Amazon.com
 |
 |
Free Home Addition Price Quotes with No Obligation!
Fill out our 3-5 minute quick and easy form, and receive a free price quote on a house addition from one of our prescreened and licensed home addition contractors. This process is free and there is no obligation to continue once you receive your house addition price estimate.


