How to Sand Drywall Mud to Achieve a Perfect Wall Finish
By Mark J. Donovan
|
|
Sanding drywall is messy and dusty business. Make sure to always wear a dust mask and eye protection when planning to sand drywall mud and have a filtered shopvac nearby. One of the best secrets to sanding drywall is to tape and mud the walls and ceilings so that limited sanding is required. If you ever watch the drywall pros you will observe that the amount of drywall sanding they do is quite limited. In many cases they limit drywall sanding to after the final skim coat of mud has been applied.
If your drywall sanding plans are limited in scope, such as a small drywall tape repair project, I highly recommend moving furniture and neighboring wall decorations out of the room to avoid having them coated in dust. |
Also, put drop clothes down directly underneath where you plan to sand drywall mud. I also find it best in these cases to have someone running a shopvac just below your hand that is sanding the drywall mud. Much of the dust is collected in this way.
For best results when sanding drywall use a pole sander and/or a hand sander. In addition use an abrasive drywall screen and a 6 inch drywall taping knife. A grout or sanding sponge can also come in handy.
If your taping knife did not sufficiently remove all the high spots, then lightly run your pole sander or hand sander, with attached drywall screen, over the mudded areas, paying most attention to the edges.
Stage 2 of Drywall Sanding
After the second coat of mud has been applied and is fully dry, again go back and lightly sand over the seams and covered nail spots. Focus your sanding energy near the edges of the mudded areas so that you blend them into the surrounding drywall area, however start the sanding process at the center of the seams and work your way outwards towards the edges.
Work in small sections at a time when using the sponge. Use the same process over the nail or screw hole areas.
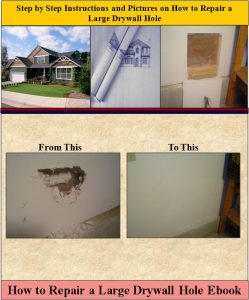
For information on repairing a large drywall hole, see the “How to Repair a Large Drywall Hole” Ebook from HomeAdditionPlus.com. The “How to Repair a Large Drywall Hole” Ebook provides step-by-step instructions on how to repair your damaged wall so that it looks as good as new.
See HomeAdditionPlus.com’s Drywall Calculator
Related Information
- How to Cut Circular Drywall Holes Using a Compass Guide Video
- How to Tape and Mud Drywall Video
- How to Make a Drywall Taped Seam Repair Video
Additional Drywall Installation Resources from Amazon.com
 |
 |
Free Home Addition Price Quotes with No Obligation!
Fill out our 3-5 minute quick and easy form, and receive a free price quote on a house addition from one of our prescreened and licensed home addition contractors. This process is free and there is no obligation to continue once you receive your house addition price estimate.


